Hello and Welcome to the May Thrift Store Challenge!

The Rules:
- Upcycle an item(s) from a thrift store, resale store, or garage sale into a new piece of decor.
- There's no monthly theme.
- There's no budget to stick to.
Meet the Hosts
Angela | Simply Beautiful By Angela - Melynda | Scratch Made Food! & DIY Homemade Household - Beverly | Across the Blvd
Our Thrift Store Upcycle group of bloggers is always looking to expand -- and we need your help! Why not consider joining in our thrift store upcycle challenge on the last Thursday of each month? Make some friends while having fun and share your love of DIY with the world. It’s a win-win! Sound like something you’d be interested in? Just leave a comment at the end of this post with your contact info and a link to your blog. Someone will get back to you right away. We can’t wait to meet you!
How to Make a Rain Boot Succulent Garden. The perfect little garden to greet your guests, share about a special occasion or simply enjoy on the way into your own home!
I have always enjoyed taking something and making it into something better, or prettier, or even something fun. I come from a long line of folks taking not very much at all, and turning it into something greater than the sum of its parts. My grandmother never wasted anything, scraps of fabric became quilts, seeds saved from a piece of fruit or vegetable became a crop in her garden. In her home, there was always something more to be made from whatever she had!
My dad use to bring home broken refrigerators from work, and turn them into freezers by running additional copper tubing for the liquid freon/ With more tubes of freon, a simple refrigerator became a freezer (this was back in 1965 before freon restrictions). He would give them away to folks needing a freezer. He also had a knack for finding old Accordions that no longer had working bellows. He would rebuild them, play them for a while and gift them forward. I guess you could say, it is in my blood to be crafty with what I have and make it work, for what I need or want.
When I saw the opportunity to be a part of a monthly Thrift Store Challenge, I took it! I knew it was time to have some fun with my ideas and creativity. Last month I worked on Barbed Wire Wreaths, both large and small. In the end, I made two! The big wreath sits at the corner of the root cellar along the walkway to our little apartment door. And while I loved having it there, it needed a touch of color. Or to put it another way, a touch of whimsy! Whimsy is new for me, but I thought "what the heck!", let's go for it!
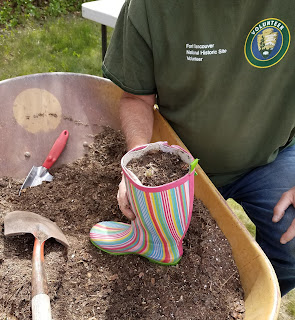
Here in Montana a lot of folks take an old pair of cowboy boots and use them as garden planters. And while we do enjoy that look, so far I have not found a pair of cowboy boots to use for this project. You see around these parts, used cowboy boots are a specialty item, high enough in price that they won't be used in my yard, honestly, I am way too frugal for that! But I did find these bright cheerful rain boots, and as luck would have it, there were two pairs to play with...
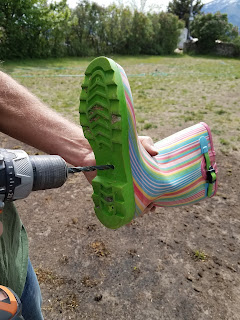
Step one: You will want to drill holes in the bottom to let excess rain or irrigation water out, a standard drill and bit work great for this. Again, "we" worked on this project together, my husband worked on the tool side of things!
Here they are now with a wooden platform to stand on, and rocks over the top of the wood. The boots stand up together and are more stable, and they look just fine. It will be fun to decorate or share a special message in this flower bed. And in a couple of years, the succulents will have grown and begin to tumble down the sides of the boots!
- 2 pair of used rain boots from the local thrift store
- rocks
- wood scraps
- soil
- compost
- succulents, from our local neighborhood plant lady
- drill
And now for more thrifty goodness!
<


