

A wedge pillow can be used for many different reasons.
One application is for a medical issue. For me it was healing my gut. It turns out that healing an ulcer is not always easy, and often you will not know what has just upset it for the day! And that day can turn into a week of bad days before healing takes place and your ulcer settles down. That is where a wedge pillow comes in. You see...
At some point, your specialist will tell you to sleep in an elevated position. So, of course, you go out to the local medical supply store in your neighborhood or on the way home from work and purchase a wedge pillow. While they don't cost an arm and a leg, they are not cheap. But fair warning, they are definitely not comfortable! And usually it is because they are in fact hard. Yes you do want to have even support and not wind up in a ball while sleeping, but it should not hurt to lay your head down for the evening.

Sleep is essential for healing...so let's make sleeping possible.
In fact, they are hard enough to keep sleep from settling in, and of course, a good night's sleep is what we all need, especially when healing...How about those other reasons to want and use a wedge pillow?
Well maybe you are thinking about a wedge pillow for a bit of extra comfort while reading in bed. Or how about when watching a bit of TV? While I never have read or watched TV in bed, I know many who do and they would like to be comfortable also!
If you answered yes to any of the reasons listed, these instructions for How to make a Homemade Wedge Pillow, are just what you are looking for. It is not hard, only takes basic skills, and a bit of time, along with a few pillows.

You need a dual purpose Wedge Pillow for overall comfort.
A Wedge Pillow will need a fair amount of firmness to keep you (and your stomach, if using for medical reasons) in an elevated position. Which the commercially made Wedge Pillow is designed to do. But for me the problem I had with the commercially made Wedge Pillow is that it hurt my head. There is not enough softness for your head to sink even partially into the pillow to be comfortable. Because...
The foam is dense and like a bully it does not give...which for me, led to a stiff neck and a daily headache. I also found it was impossible to use my favorite nighttime pillow along with the foam wedge pillow. And since I use a neck roll pillow for support, this became a daily painful problem.
The foam is dense and like a bully it does not give...which for me, led to a stiff neck and a daily headache. I also found it was impossible to use my favorite nighttime pillow along with the foam wedge pillow. And since I use a neck roll pillow for support, this became a daily painful problem.
The solution? Make my own Wedge Pillow.
All of that led me to try and make my own. First I purchased 4 pillows. But keep in mind, you may use pillows you already have. When I brought them home, I had an idea, but not a solid plan. To test my idea, I safety pinned the pillows together in the configuration I thought might work the best. After sleeping on my crude pillow mountain for two days, I knew I was close. But I took another day to think it through. To avoid having to take it all apart and remake it...
Originally I had all the pillows going one way.
Unfortunately, assembled with all the pillows laid in a single direction, they tend to separate. Separation soon equals no support in the middle of the night...after a more little thinking, I came up with the needed changes for a supportive and comfortable pillow. I started with a base pillow in the vertical position and three additional pillows cascading horizontally. This two way positioning of the pillows does call for at least one king or queen sized pillow. All the other pillows used were standard sized.
Let's get started...
Supplies
needed for this project:
- 1 Queen or King-sized pillow for the vertical pillow base** see note below
- 3 or 4 standard-sized pillows
- buttons
- thread
- sewing needle
You
will also need the following:
- scissors
- measuring tape, if desired for placement
Now
we are ready to begin!
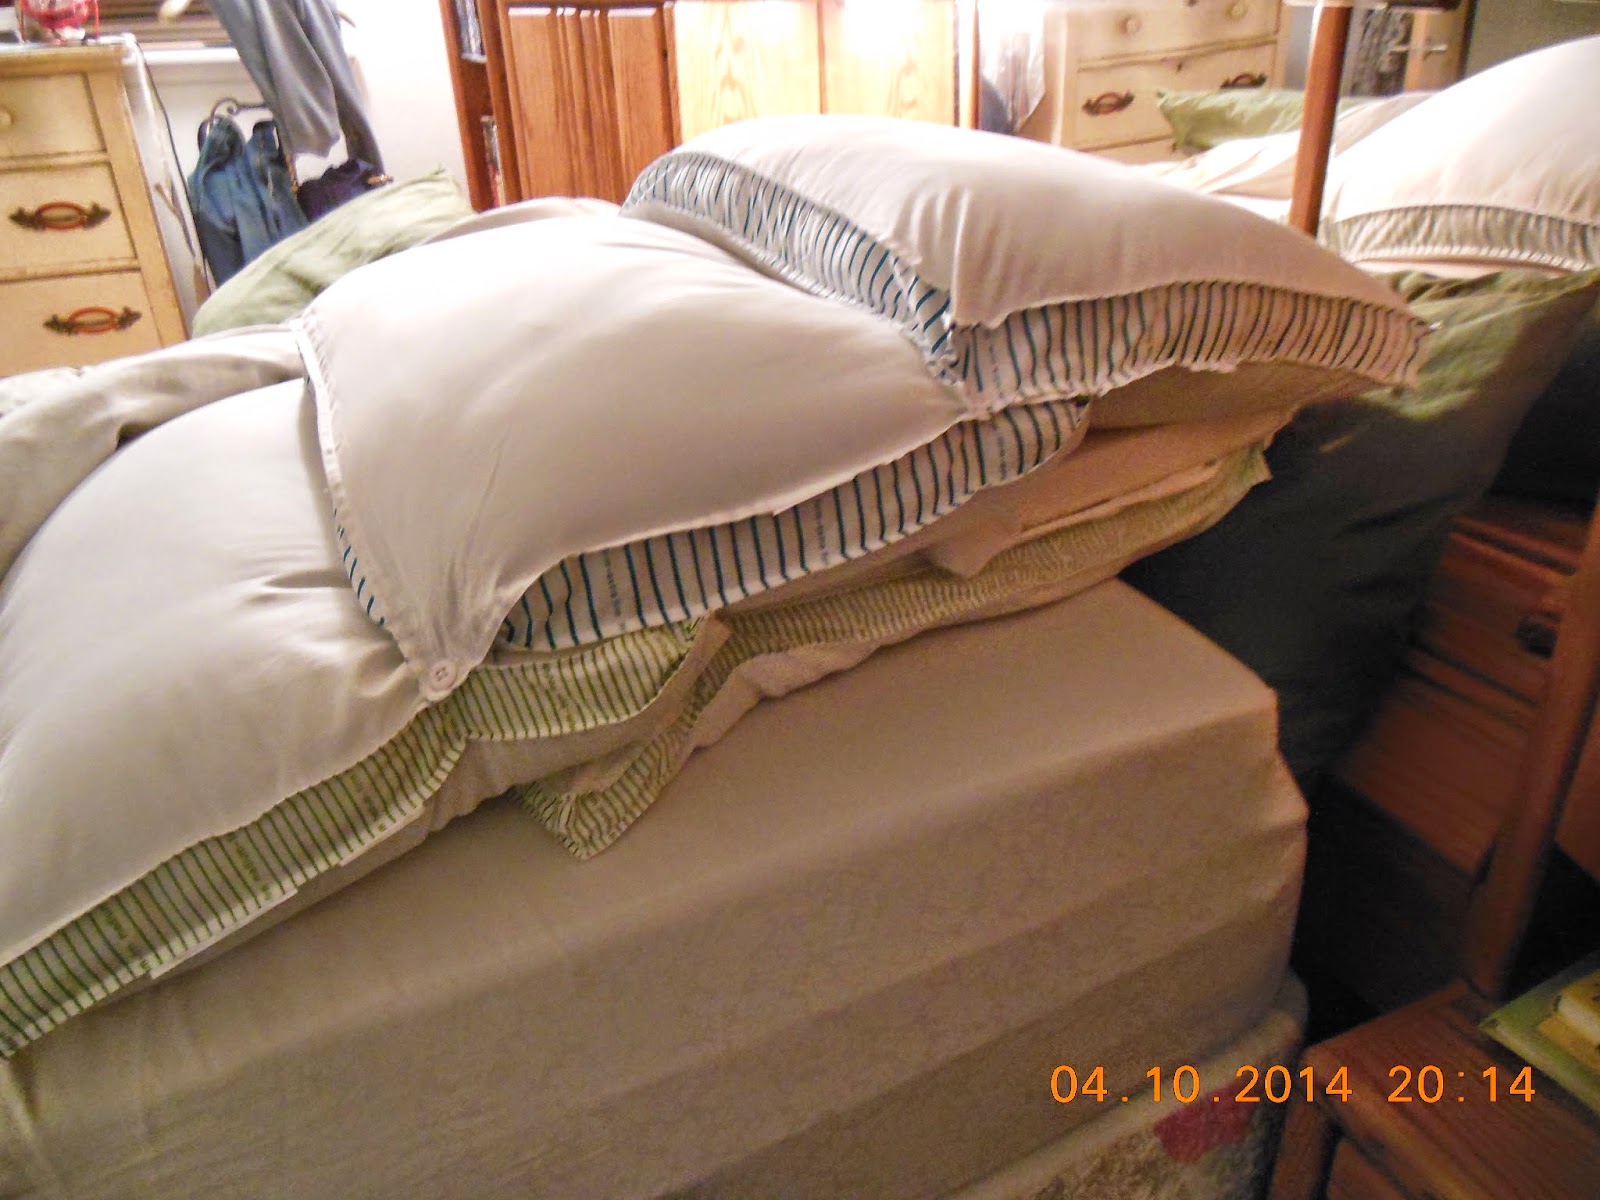
Starting at the bottom with the vertical pillow (Use a queen or king size pillow for the vertical pillow, based upon your own height.), attach the first horizontal pillow. The first pillow may extend beyond the bottom edge of the vertical base pillow. Stitch the pillows (vertical and horizontal) together with a button for strength, at each contact point. This will prevent the stitches from being torn open/out.

Proceed by attaching another pillow halfway between the top of the bottom vertical pillow and the top of what will be the entire pillow wedge.
This middle pillow will cascade over the first pillow, which is actually the bottom of the wedge, you are building your Homemade Wedge Pillow in reverse, from bottom to top.
And finally, attach the top pillow to the top of the wedge. Secure with buttons as needed, where pillows come together.
Note, if you have chosen to use 4 horizontal pillows, space accordingly for the four pillows.

This is the side view of the finished project. While not beautiful, it is very usable and comfortable enough so that it won't give you a headache, while offering good support. The wedge is also soft enough to use your regular pillow as well, should you want.
Important: the challenging part of using a wedge pillow successfully is staying at the top. In regards to this homemade pillow wedge, your own bottom should be on the bottom pillow, with your head resting on the top pillow. This sounds like common sense and is, but you will find that it takes a bit of practice to get up and onto your new wedge pillow, in this preferred position.
Important: the challenging part of using a wedge pillow successfully is staying at the top. In regards to this homemade pillow wedge, your own bottom should be on the bottom pillow, with your head resting on the top pillow. This sounds like common sense and is, but you will find that it takes a bit of practice to get up and onto your new wedge pillow, in this preferred position.
** if you are tall you may want to use a King sized pillow for the base with 4 standard pillows laid in the waterfall pattern.
#DIYHomemadeHousehold
Thanks for stopping by!
We
offer new and delicious recipes as well as DIY ideas for your home, regularly.
Feel free to drop us an email request for any question or recipe you may be
looking for. In addition, like all our guests, we invite you to come for a visit
again and again for new recipes, and my down-home take on frugal ways to keep
your home in tip top shape.
Hey
you, don’t miss a post! Please consider following Scratch Made Food! & DIY
Homemade Household. To follow by email, and/or by RSS feed, complete the
application located on the right-hand side of the blog. Please Note,
some posts may contain affiliate links, thank you for supporting Scratch
Made Food! & DIY Homemade Household.
PS, friends, and family
who love good food and household ideas might love us too! Tell them about us,
and thanks for the referral!
You may also enjoy, Creative writing from the heart... stories of life, living, and family.
Scratch
Made Food! & DIY Homemade Household proudly shares with these generous link
parties featured here.


Good to know how to do this! Thanks so much for linking up with me at A Themed Linkup 48 for Crafts and DIY. Pinned!
ReplyDeleteThank you Dee, I appreciate sharing with your fun linkups! Have a great week ahead, take care.
DeleteVisiting again to say thanks so much for linking up with me at A Themed Linkup 56 for Crafts and DIY. Pinned! again
ReplyDeleteDee, thanks for hosting!
DeleteVisiting again to say thanks so much for linking up at the Unlimited Link Party 68. Pinned!
ReplyDeleteThanks so much for hosting Dee!
DeleteI appreciate the specific details, Melynda! Working with individual pillows can be challenging, this seems to solve the problems. Thanks for sharing!
ReplyDeleteYou are welcome!
DeleteVisiting again to say thanks so much for linking up at #IMadeItMondayLinkParty 11. Shared.
ReplyDeleteThank you Dee, have a great week ahead!
DeleteA very interesting topic that I have never thought of, although lately sleeping on the side has been a challenge, meditation helps. Knowing is good. Visiting from the #SSPS 277 @7, 8 & 9. Thanks for sharing with us ~ Julis Syl
ReplyDeleteJulie, you are welcome!
Delete